I recently joined a journal quilting group with the intention of making one quiltie a month featuring a family member/ancestor.
This is my journal about making my quiltie......
I had the design all worked out, decided to print off the background onto some calico. Found my fabric, hand washed it, dried it, ironed it, soak it in bubble jet, allowed it to dry naturally, ironed it.....
Ironed it onto freezer paper, cut it carefully to make sure it would go through the printer without mishap, put it in the printer, it got stuck. Too thick to go through. No problem, I have another printer somewhere with a differant feed system. Search for and found the printer. Drivers out of date so searched for and installed the drivers, it needed a parrallel cable, searched the loft, couldn't find one. Swore, checked again and realised that there was a usb socket hidden on the side, plugged it in...no ink. Searched for and found new ink cartridge (back of drawer, fancy me having one). Getting excited......put my ink jetted fabric in feed. Bloody thing wouldn't go through, too thick. Said very rude word.
So I found some cotton fabric that would fit through the printer (it is whiter and finer than I really wanted but needs must).
Sent a piece through without bubble jet setting it and tested it thoroughly. No smudging, the ink stayed put. Did another, messesed up the quilting so dyed it with tea to see what it looked like. Looked ok and no smudging.
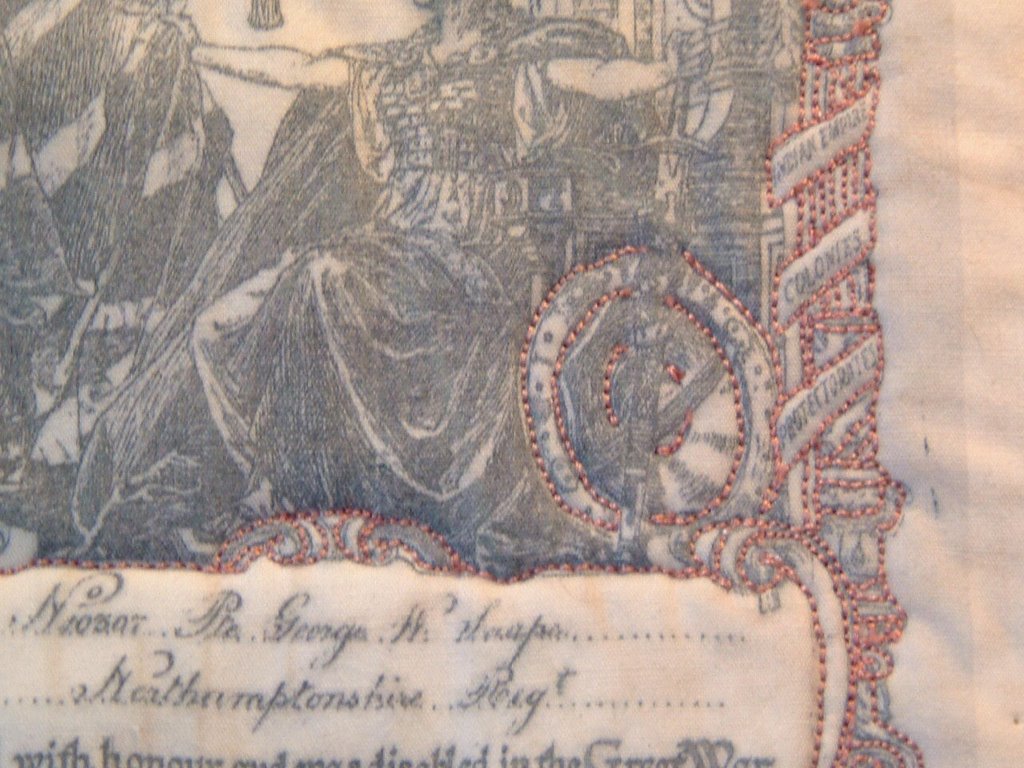
So I printed my picture and spent hours quilting it. It is only small but so are my stitches and I only go slow.
Used the purple air vanishing market on one spot as the print wasn't very clear and the line was important. Too impatient to wait for it to disapear so I sprayed it lightly with water.....bloody ink ran.
I have decided that it must have meant to be a bit smudged so will leave it....but, I wanted to age it with tea. Dare I?
I bubble jetted setted some cotton fabric. Whilst I waited for it to dry naturally, I thought I might as well experiment with with the messed up piece.
So I sprayed it with walnut ink. The print stayed put but I didn't like the effect of the walnut staining. So I made up some tea and dabbed it with that. Oh dear, it turned bright orange, obviously I use the wrong brand of tea!
No problem, it had already gone wrong, so nothing lost. I scrubbed it in soapy water to see if the tea would fade, not a hope. However, the original smudging of the print did wash out leaving me with a perfect print. Perfectly quilted. But a bright orange colour! Deep sigh.
Todays bubble jet setted fabric has now dried. Ironed onto freezer paper, printed on and is waiting to be quilted again.
Got up this morning raring to go and quilt my piece. Saw that it had printed in blue ink. Said new naughty word!

I have decided to think this through. I get my pfd cotton fabric. Soak it in bubble jet set. Print in black and white mode. Rinse it with the bubble jet rinse. Stain it with walnut ink. Quilt it.
Hu-flippin-ray.
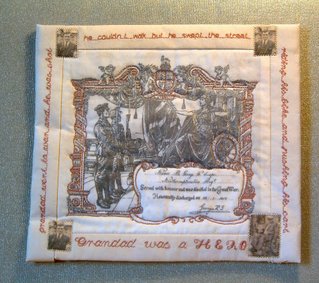
The binding was easy, I stained some more of the fabric, backed it with iron on stabliser, added tear away and stitched the text using the fab Pfaff. I used inkjet t-shirt transfer paper to print off the photos of grandad, backed them with bondaweb and ironed them into place. Simple zig-zag stitching to finish.
I printed some information about grandad about grandad onto t-shirt paper and collaged the prints onto more cotton fabric. Used a little bondaweb to stick this onto the reverse of the quiltie and hand hemmed the binding into place. I have left the left hand edge unstitched as I am not sure how I am going to finish the quilties, maybe make a book with them.